Stay up to date with Tempo Announcements and News

How to Create a DIY Ethernet Cable
Creating your own RJ45 CAT6/CAT5E Ethernet cable can be a rewarding DIY project, whether you're setting up a home network, gaming setup, or professional workspace. Here’s a simple, step-by-step guide to get you started.
MATERIALS NEEDED:
Electrician Snips (Tempo Part number: PT-T03)
Cable cutters (Tempo Part number: PA1179)
CAT5E or CAT6 Connectors (Tempo Part number: PA9560/PA9562)
RJ45 Crimper Pass through or standard (Tempo Part number: PA1562/PA1561)
Cable Tester (Tempo Part Number: NC-100)
Ethernet Cable Stripper (Tempo Part number: 1076-5000)
1. Measure and Cut Your Cable
First, measure the length of Ethernet cable you need, adding a little extra for flexibility and adjustments. Use your cable stripper or cutter to carefully cut the cable to your desired length. It's crucial to ensure a clean cut to avoid damaging the internal wires.
2. Strip the Cable Jacket
Carefully strip about an inch or two of the cable jackets from the end, ensuring not to nick the internal wires. You'll see four twisted pairs of wires in different colors. Some CAT6 cables may also have a plastic spline (a cross-shaped structure) for maintaining wire separation and reducing crosstalk, which needs to be removed.
3. Untwist and Arrange the Wires
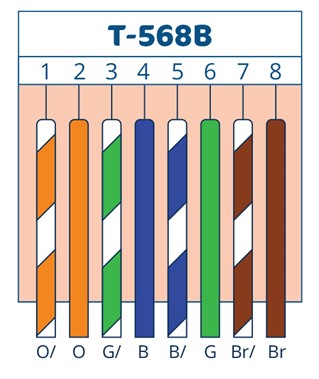
Untwist the pairs and straighten the eight wires. Arrange them according to the T568B wiring standard, which is the most common:

White/Orange
Orange
White/Green
Blue
White/Blue
Green
White/Brown
Brown
*Ensure the wires are flat and in order side by side.
4. Trim the Wires
Once the wires are properly aligned, trim them to about half an inch (1.27 cm) from the edge of the cable jacket. This ensures they fit perfectly into the connector. Make sure the cut is straight across all wires to maintain the same length.
5. Insert Wires into the Connector

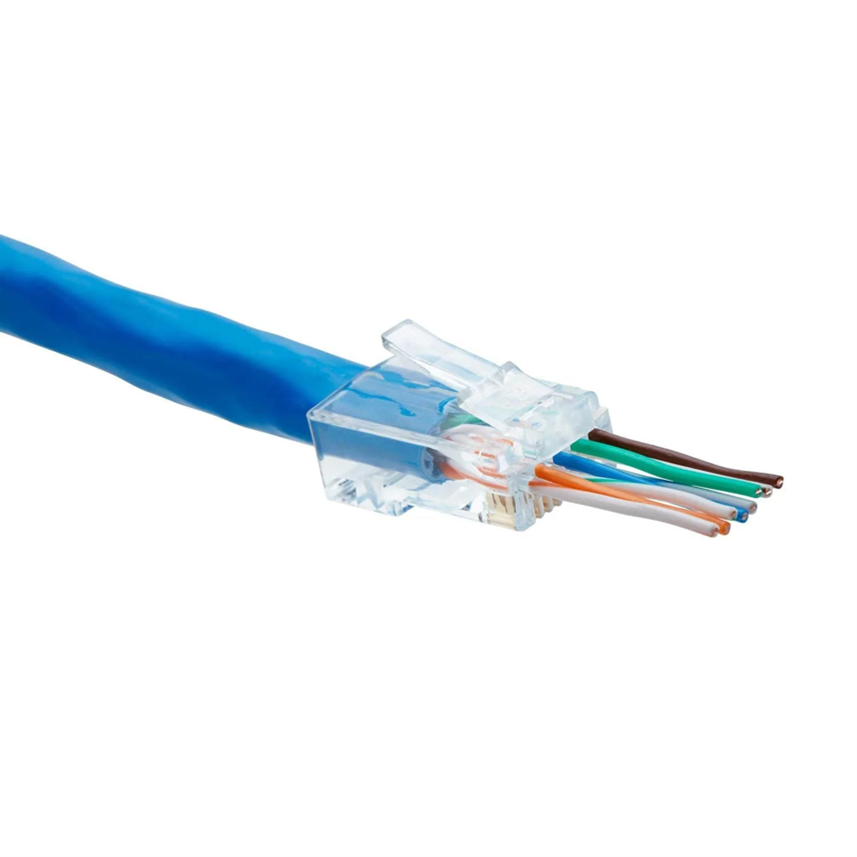
Carefully insert the wires into the RJ45 connector, ensuring each wire follows through to the end of the connector. The transparent body of the connector allows you to visually check that the wires are correctly ordered and fully inserted. If you have a pass through Connector you will be able to confirm Wire order and confirm that all wires are flush by inserting the cables through the connector.
6. Crimp the Connector

Insert the connector into your crimper, making sure it's properly seated. Apply a firm squeeze to crimp the connector onto the cable. If you have a Pass-Through crimper, it will also trim the excess wire from the end of the connector, ensuring a neat finish.
7. Test the Cable
Before deploying your newly made Ethernet cable, it’s essential to test it with a cable tester. This ensures connectivity and identifies any issues with the wire alignment or connection.